This is a little thing, but as it took me a while to hit on the best combination for my needs, I thought it might be useful to others. Of course, make sure that ripping the movies that you own on Blu-ray for your own personal use is actually legal in your jurisdiction.
That assumed, you’re going to need a Blu-ray drive. No Mac currently ships with one (Steve Jobs’ “bag of hurt” statement continues to hold sway), so you’ll have to add it yourself. I have an internal drive that I put in the second optical bay of my Mac Pro, but if you have a more compact system, my understanding is that there are external drives that will work just as well (though I don’t have personal experience with those).
I use MakeMKV to rip the Blu-ray movie to a Matroska Video File. Just pop the disc in the drive and once it loads, click the “Open Blu-ray Disc” button.

It will scan the disc for all of the available tracks, and present them to you. The first thing I usually do it right-click on one of the checkboxes and choose “Unselect all”, since usually I only want one or two tracks, at most. You can usually guess which track is the main movie by it being the largest file size (here, 31.5 GB) with a decent number of chapters.
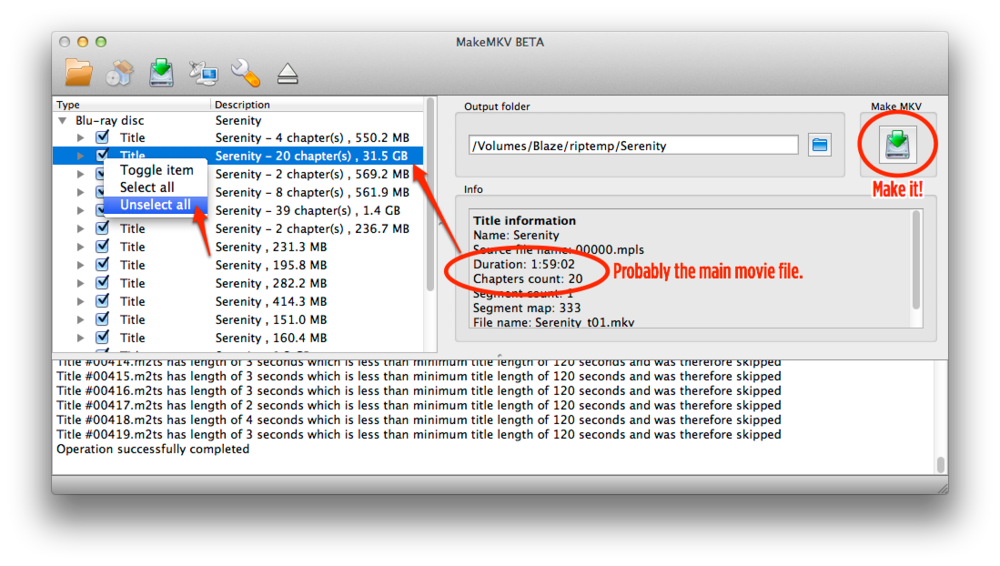
Once you’ve got just the ones you want to rip checked, hit the “Make MKV” button, and let it run for a half hour or so. You can play the resulting MKV files straight in the VLC media player if you want to confirm that you ripped the right track(s) before moving forward.
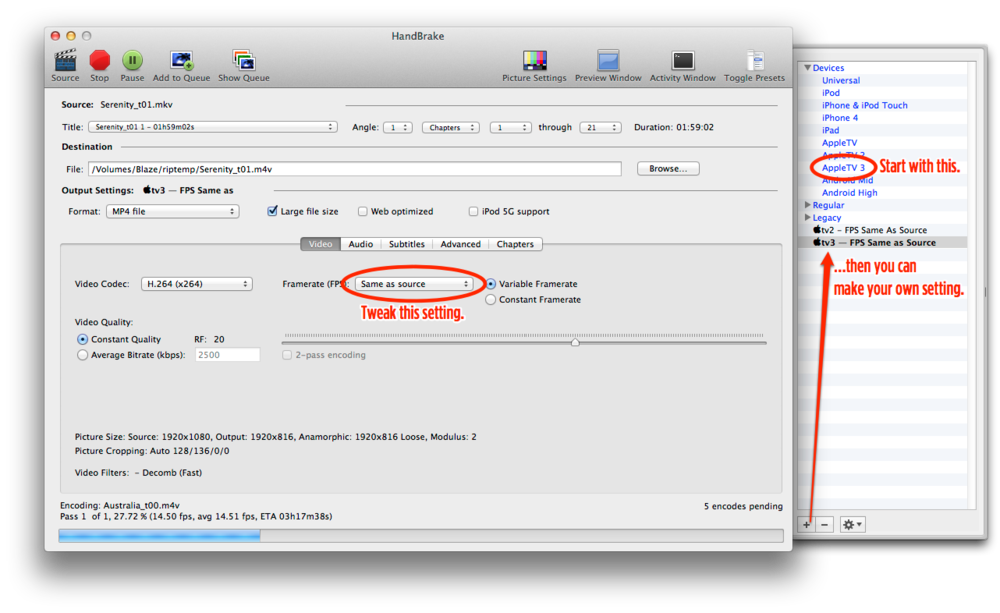
After creating the MKV, it needs to be converted to a 1080p format that will play smoothly on the AppleTV and iPad (3rd generation, both). After dabbling with Permute (which is awesome for other video conversions, but doesn’t yet support some of the features I need for BD movies) and iFlicks (which works well, but creates ha-yuge files), I went back to my first love for DVD ripping, Handbrake. They’ve added a nice “AppleTV 3” preset that works well, except I switched the Framerate setting to “Same as source”, because I certainly don’t want my 23.976fps films to get messily converted to 30. The default audio settings in here should work well, creating a stereo mixdown track that will play on the iPad, and copying over the original surround sound tracks for playback on the AppleTV. You can add more audio tracks if you want additional languages, or commentary tracks (if available).
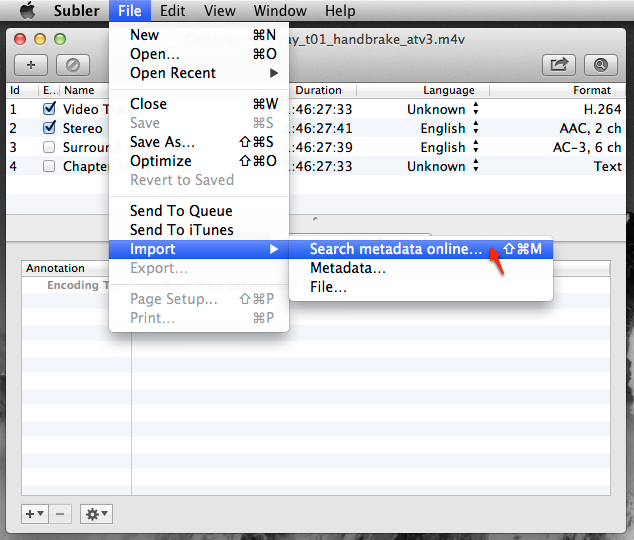
After creating the M4V with Handbrake, I again looked at iFlicks and Subler for setting all of the nice metadata that makes you movie look professional (that you can’t edit directly in iTunes), and Subler came out the winner. iFlicks has a little bit nicer user interface, but Subler seems to do a better job on the metadata, including chapter images. You can even give the chapters proper titles, if you like.

It’s really easy to add movie metadata, since you can search for metadata online...
...including full movies details...
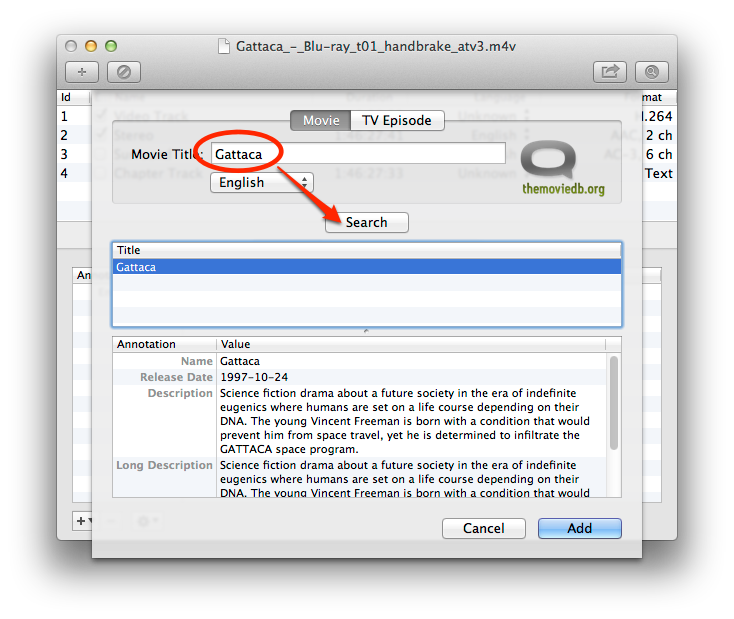
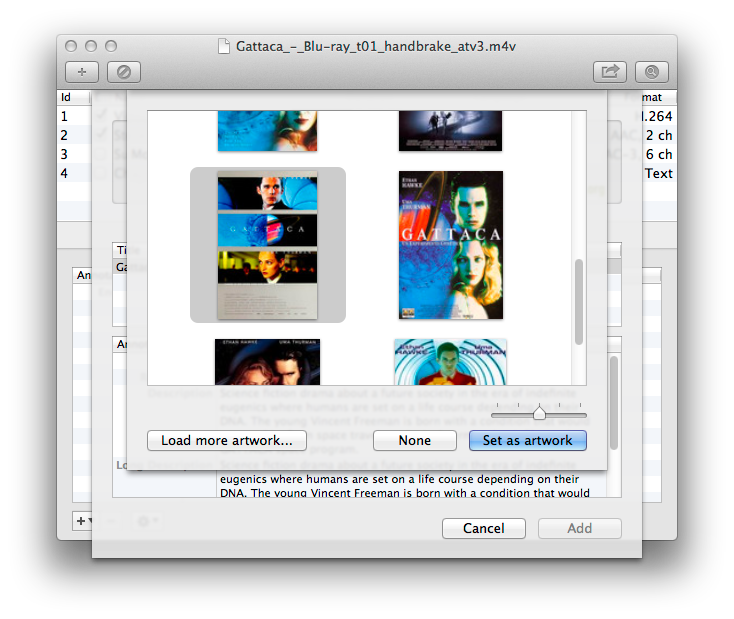
...and even artwork.
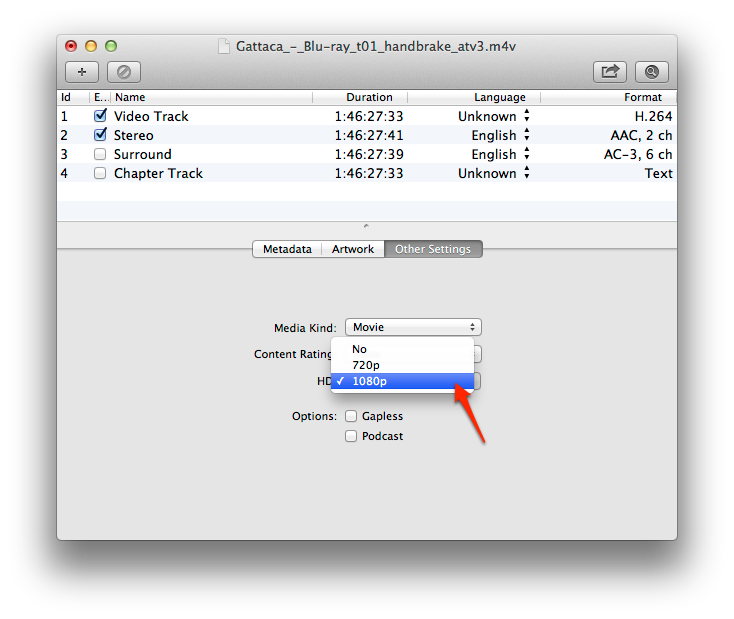
It will even tag it as 1080p HD for you, so that cute little HD tag shows up in iTunes.
From there, you can load it into iTunes and share it with your AppleTV and your iPad. If you didn’t know about it already: once you’re playing a movie on the AppleTV, you can hold down the select button for a couple of seconds to bring up the menu for selecting a chapter (your titles would appear here if you’d added them in Subler), or a different audio track, if you added more in languages (or a commentary) in Handbrake.
This post is detailed and absolutely superb. Well done! I use MDRP for SD DVD ripping (no BR) so your walk through is welcome. Appreciate the efforts!