I'm writing this because just about every explanation of widescreen video on the web takes too long to get to the point, what with all the "history of video" and all that crap, and people like my friend AAl will give up before they even get to the first figure. So, without further ado:
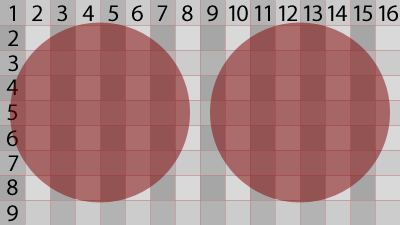
Pretend this is a widescreen video image. Some might call it 16:9 (or 16x9). Unfortunately there is no "real" widescreen video format until you get into High Definition (which we're not getting into right now). Because of this, there are three possible ways to get this wide image onto our non-wide (some might say 4:3) videotapes and DVDs:
1. Pan-n-Scan
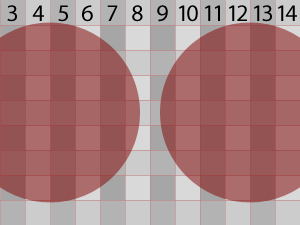
This method chops off part of the sides of the images to make it fit. You lose a quarter (1/4) of the picture this way. Not good.
2. Letterbox
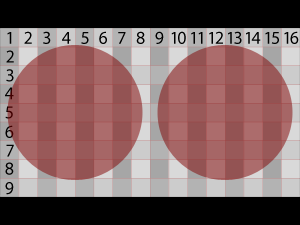
Here, at least we get to see the entire widescreen image, but it's been shrunk down. Precious video detail is thrown away because we made it smaller, and part of the video signal is displaying no information at all--- those pesky black bars. if only there were some way we could use all the space...
3. Anamorphic
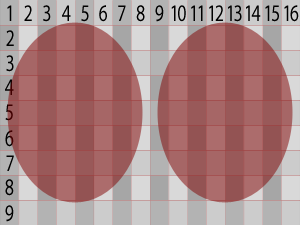
Anamorphic squishes the video horizontally so it all fits in the space we have (see how the circles look squished?). Sure we lose a tiny bit of information, but not nearly as much as letterboxing, and all DVD players know how to stretch it back out so that it fills your widescreen TV and looks like Figure 0 again. So, whenever you see a DVD that says "Enhanced for Widescreen TVs", that's what they've done.
That's it. Story over.