iPhone 6 and 6 Plus Mockups
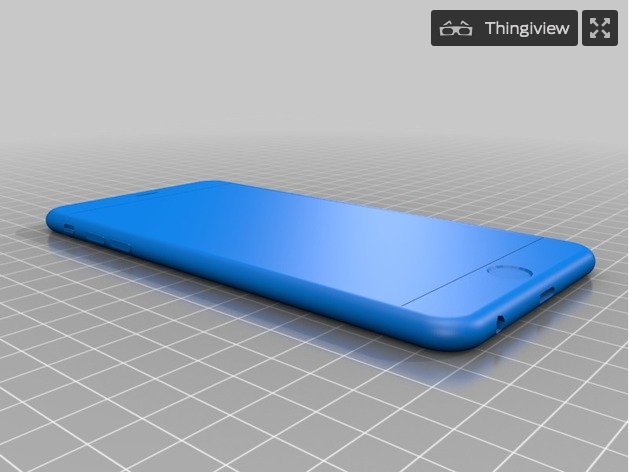
If you’re itching to see if the iPhone 6 Plus will fit in your pocket, I made these mockups (also including the regular-size iPhone 6) that you can print on a 3D printer.
It’s been six months since we moved to Seattle, so I thought it was finally time to get my 3D printer out of mothballs. Well, at least that giant box full of Styrofoam peanuts.
I hadn’t left it in a great state the last time I used it. ABS plastic had gotten stuck in the nozzle, and heated to the point where it was a bit crunchy. So, first I had to burn the ABS out from the brass nozzle, (but minus the alcohol bath, because I’m really not fond of unnecessary fireballs).
After cleaning out the nozzle assembly, I screwed it back into the MakerGear GrooveMount and it was a little tough going, so I used a wrench to tighten it some more… and promptly cracked the entire GrooveMount in half because I torqued it way beyond what it was designed to withstand.
Oops.
So… enter a week of waiting for my shiny new GrooveMount.
Got that in an mounted last night, and started trying to print some calibration objects, and immediately ran into a temperature problem. Let’s back up.
I had installed the latest version of the Marlin firmware, and am now using Repetier-Host (Mac) to run the printer. However, the PID settings I had pre-set for the hot end were resulting in the temperature never actually hitting the target, but hovering about 10ºC below. Thankfully, I found out that the Marlin firmware now auto-calibrates PID settings, which gave me much more accurate temperature control. After about 4 minutes of setting the target temp, my hot end now settles in with only fluctuating within a degree or so of the target.
Now, I’m back to following the calibration advice here, here, and here, to get things back in ship-shape.
More to come once I get everything re-calibrated.
With some of the holiday cards I send out this year, I included a plastic snowflake ornament that I printed on my 3D printer. Granted, a relatively flat ornament is not the best design to show off what a 3D printer can do, but it is one that fits inside a holiday card envelope and doesn’t push the weight over the 1-ounce mark.
If you’re not familiar with 3D-printers, you could look up the dry Wikipedia article that looks kind of boring and technical, or your could . Basically, it lays down very thin (less than 1/3 of a millimeter) layers of melted plastic until they build up to something.
I built the printer from a kit that I got about a year ago, with all of the metal rods and motors and a ridiculous number of nuts and bolts. After two weeks of building the printer, several months calibrating it, forgetting about it, getting too busy with work, fiddling with it some more, printing out cute (and functional!) tiny alligator clips, jamming the print head, and fiddling with it just a bit more, I’m finally getting it close to useful.
As you can tell, 3D printing is probably not yet ready for the average home user. But if you like to fiddle with mechanics, robotics and electronics, it can be a lot of fun. The finish on my prints isn’t quite perfect yet (still needs more fiddling), but it’s getting pretty close.
So, this holiday season, I went to Thingiverse, which houses tons of free models that other people have created and uploaded for you to print with your printer, downloaded a snowflake ornament, and modified it a little bit. And then the printer went to work.
(Warning, this video, though a time lapse representing over two hours of printing, is still 7 minutes long and kinda boring, but if you want to see how your snowflake was made, this is it! I recommend watching a little bit at the beginning, and then skipping to about the 6-minute mark.)
And then I stuck it in an envelope with a link, and maybe you typed that link into your browser, and here we are. Enjoy!