
Recently, I wanted to upgrade my website on ye olde Django 1.6.5 to finally come up to speed with Django 1.8.3 (current, as of this writing). However, I realized that upgrading a WebFaction webapp in situ seemed to be a rather painful process. In addition, WebFaction doesn’t set you up with Virtualenv by default, and I’d like to be able to upgrade Django and the other packages I need for my site without affecting any of my other sites.
I’m going to show how I did my upgrade, but of course, you may have things set up differently, and YMMV. However for a relatively simple site, like mine, I hope this will be helpful.
Note
A Django project has apps inside it, but please don’t be confused — I will try to say webapp to refer to the WebFaction concept of an application as a server component, so we don’t get mixed up.
We’ll be moving from the WebFaction webapp old_django to the new one we’ll create, new_django. (Replace my generic example names with your own.) I’m using Python 2.7, so if you’re using Python 3.x, some of this may be different, especially with venv and pip now included in Python 3.4.
Warning
I am not a trained developer with a CS degree. I’m just an average Joe who wanted to build a cool website, and has stumbled his way through learning Python and Django and a little bit of server administration to do it. Granted, I’ve been building websites for myself since 1996, but it is not my profession, only an avocation. I might have made a mistake. Hit me up on Twitter and let me know if you see anything amiss.
Recreate the server webapp, but with virtualenv
We want to install virtualenv, so we can upgrade Django easily in the future with pip. To enable that, let’s start a new WebFaction webapp that we’ll eventually swap out for the old old_django webapp. I’m going to mostly follow the steps outlined in this post by Michał Karzyński, except that I’m going to add on virtualenvwrapper for extra convenience. I’m also going to start the new webapp with component versions very near my currently-installed Django 1.6.5, so I can make sure that my Django project works as-is under virtualenv before I upgrade it.
Warning
For a production site, you might want to fail over to a working duplicate site while you’re upgrading the production server. I’m not going to get into it here, but you might need to sync your database before failing over, to make sure you’re serving the latest data.
Run pip freeze > requirements.txt on the old site, while we’re at it, to make sure that list of required packages is up to date.
Create a new WebFaction webapp
On my.webfaction.com, log into your account and go to:
- Domains / Websites > Applications > Add new application
- Name:
new_django - App category:
mod_wsgi - App type:
mod_wsgi 4.4.11/Python 2.7(unfortunately, my dependencies aren’t ready for Python 3 yet, but do what works for you here — you can always create a second test webapp and try it out) - Save
Enable the new WebFaction webapp
Still on my.webfaction.com, go to:
- Domains / Websites > Websites > mysite
- Add an application > Reuse an existing application
- Select
new_djangothat we just created - In URL, type
new_django(because we’re going to test it on a sub-path first) - Save
- Again, in the site config, Save
Go to http://mysite.com/new_django/, and you should see the “Welcome to your mod_wsgi website!” page. (It may take a minute or so for this URL to update and start showing the new webapp.)
Note
If you have another domain (or subdomain) which you’d rather test the new webapp on, that is also a good option, but I’m not going to go into that here.
Remove htdocs
Now that we’ve seen /webapps/new_django/htdocs powering the test wsgi page, its usefulness has passed, so delete the directory.
Note
For file management on my server, I’m using the Mac app Transmit to connect over SFTP. I’m going to assume that if you prefer to manage your files in the command line, you know how to do that.
Install Virtualenv
Check if Virtualenv is installed on your server:
$ virtualenv --version-bash: virtualenv: command not foundIf Virtualenv is installed, you’ll see a version number when running the above command. If it’s missing, you’ll see a command not found error message instead (as above).
I already have pip installed for my user, so let’s install virtualenv:
$ pip install --user virtualenvVerify that installation was successful:
$ virtualenv --version13.1.0Install virtualenvwrapper
Set up some environment variables first, then use pip to install virtualenvwrapper:
$ PYTHONVER=2.7$ PYTHON=python${PYTHONVER}$ mkdir -p $HOME/tmp$ pip install --user virtualenvwrapperUpdate ~/.bashrc with appropriate environment variables
$ echo 'export PATH="$HOME/bin:$PATH"' >> $HOME/.bashrc$ echo 'export TEMP="$HOME/tmp"' >> $HOME/.bashrc$ echo "alias python=${PYTHON}" >> $HOME/.bashrc$ echo "export PYTHON=${PYTHON}" >> $HOME/.bashrc$ echo 'export WORKON_HOME="$HOME/.virtualenvs"' >> $HOME/.bashrc$ echo 'export VIRTUALENVWRAPPER_TMPDIR="$WORKON_HOME/tmp"' >> $HOME/.bashrc$ echo "export VIRTUALENVWRAPPER_PYTHON=/usr/local/bin/$PYTHON" >> $HOME/.bashrc$ echo 'source $HOME/bin/virtualenvwrapper.sh' >> $HOME/.bashrc$ echo 'export PIP_VIRTUALENV_BASE=$WORKON_HOME' >> $HOME/.bashrc$ echo 'export PIP_RESPECT_VIRTUALENV=true' >> $HOME/.bashrcLoad these changes into your Terminal:
$ source $HOME/.bashrc$ hash -rNow, we can work on our virtual environments a little easier. Go ahead and run this command to create the virtualenv myvenv that we’ll be using, and immediately activate it:
$ mkvirtualenv --no-site-packages myvenvDon’t run these now, but here are some other handy virtualenvwrapper commands:
# Activate virtualenv "myvenv"workon myvenv# Deactivate current virtualenvdeactivate# Remove virtualenv "myvenv"rmvirtualenv myvenvAt this point, I was still seeing the system site packages inside my virtualenv. I was rather confused at why this was the case, having installed it with the --no-site-packages option. After a bit of digging, and help from WebFaction support, I found out why.
There is a global site customization policy in WebFaction’s system Python installations, and virtualenv isn’t able to ignore it. To work around this, create an empty file named sitecustomize.py in your virtualenv’s lib/python2.7 directory. For us:
$ touch ~/.virtualenvs/myvenv/lib/python2.7/sitecustomize.pyNow you shouldn’t see the system site packages when your virtualenv is activated. Hooray for encapsulation!
Install Django!
Okay, let’s install Django inside the virtualenv. Make sure the virtualenv is active, and run workon myvenv (as above) if not. We’re going to install Django 1.6.11, which is a couple of minor versions later than the current 1.6.5 on my server, but not so late that it won’t be compatible with the current site code. That way we can make sure the version is installed and working.
Note
You could install the exact same version, trust that virtualenv is doing its thing, and that you’re seeing django run inside the virtualenv when we test it in a few steps, but I’d rather know for sure, wouldn’t you?
(myvenv)$ pip install django==1.6.11(myvenv)$ django-admin.py --version1.6.11If we deactivate and check the version again, it should show 1.6.5, the old version. (If you do, be sure to run workon myvenv to get back inside the virtualenv before proceeding.)
Start a Django project
Let’s create a new Django project inside the virtual environment, so we can be sure that Django is actually installed and working:
(myvenv)$ django-admin.py startproject test_django
Configure Apache and WSGI
We are now ready to configure Apache to serve our Django project. In order to do this, we’ll need to modify the contents of the Apache configuration file, ~/webapps/new_django/apache2/conf/httpd.conf. Copy the original file to a backup for reference and make these changes:
ServerRoot "/home/myuser/webapps/new_django/apache2"LoadModule authz_core_module modules/mod_authz_core.soLoadModule dir_module modules/mod_dir.soLoadModule env_module modules/mod_env.soLoadModule log_config_module modules/mod_log_config.soLoadModule mime_module modules/mod_mime.soLoadModule rewrite_module modules/mod_rewrite.soLoadModule setenvif_module modules/mod_setenvif.soLoadModule wsgi_module modules/mod_wsgi.soLoadModule unixd_module modules/mod_unixd.soLoadModule alias_module modules/mod_alias.soLogFormat "%{X-Forwarded-For}i %l %u %t \"%r\" %>s %b \"%{Referer}i\" \"%{User-Agent}i\"" combinedCustomLog /home/myuser/logs/user/access_new_django.log combinedErrorLog /home/myuser/logs/user/error_new_django.logListen 22884KeepAlive OffSetEnvIf X-Forwarded-SSL on HTTPS=1ServerLimit 1StartServers 1MaxRequestWorkers 5MinSpareThreads 1MaxSpareThreads 3ThreadsPerChild 5WSGIPythonPath /home/myuser/webapps/new_django:/home/myuser/webapps/new_django/test_django:/home/myuser/webapps/new_django/lib/python2.7WSGIDaemonProcess new_django processes=2 threads=12 python-path=/home/myuser/webapps/new_django:/home/myuser/webapps/new_django/test_django:/home/myuser/webapps/new_django/lib/python2.7WSGIProcessGroup new_djangoWSGIRestrictEmbedded OnWSGILazyInitialization OnWSGIScriptAlias / /home/myuser/webapps/new_django/test_django/test_django/wsgi.pyAnd then in test_django/test_django/wsgi.py:
"""WSGI config for test_django project.It exposes the WSGI callable as a module-level variable named ``application``.For more information on this file, seehttps://docs.djangoproject.com/en/1.6/howto/deployment/wsgi/"""# Also import sys and site to help enable virtualenvimport os, sys, site# Add the site packages, to override any system-wide packagessite.addsitedir('/home/myuser/.virtualenvs/myvenv/lib/python2.7/site-packages')# As isos.environ.setdefault("DJANGO_SETTINGS_MODULE", "test_django.settings")# Activate the virtualenvactivate_this = os.path.expanduser("~/.virtualenvs/myvenv/bin/activate_this.py")execfile(activate_this, dict(__file__=activate_this))# Calculate the path based on the location of the WSGI scriptproject = '/home/myuser/webapps/new_django/test_django/'workspace = os.path.dirname(project)sys.path.append(workspace)sys.path = ['/home/myuser/webapps/new_django/test_django', '/home/myuser/webapps/new_django/test_django/test_django', '/home/myuser/webapps/new_django'] + sys.path# As isfrom django.core.wsgi import get_wsgi_applicationapplication = get_wsgi_application()Now, restart the server:
(myvenv)$ ./apache2/bin/restart
aaaaaand…
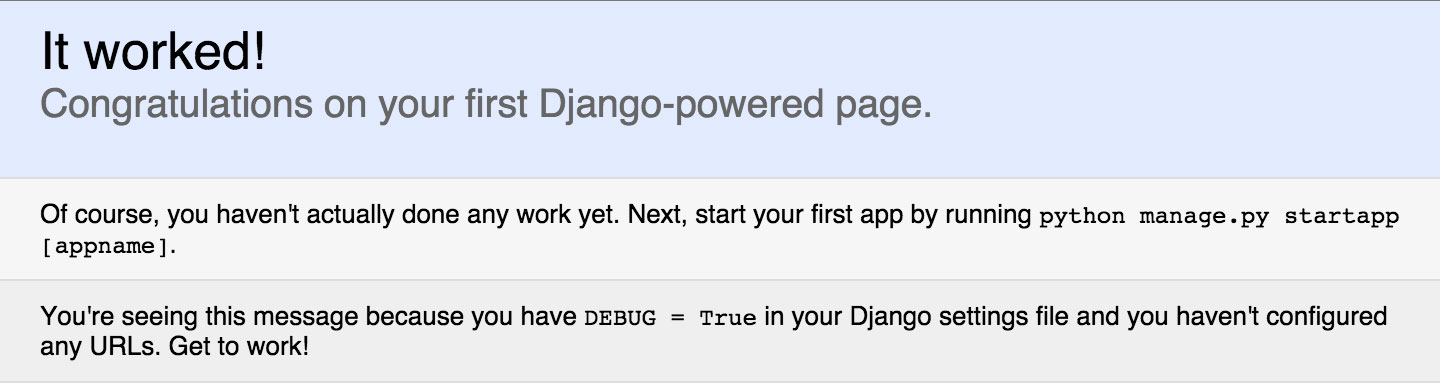
Whew!
Copy the old Django project
Copy over the old Django project, mydjangoproject with Transmit. I opened the two webapp folders side by side in Transmit and copied the whole Django project folder over to beneath the new webapp.
Install dependencies
Assuming you have a requirements.txt from inside the previous mydjangoproject Django project, edit it to include:
Django==1.6.11South==1.0.0…so we can be as close to Django 1.8 and its built-in migrations as possible. (Also, Django 1.6.11 doesn’t play nice with the ye olde version of South I had installed before.)
Make sure you’re in the right directory to reference requirements.txt and install your app’s dependencies:
(myvenv)$ cd ~/webapps/new_django/mydjangoproject(myvenv)$ pip install -r requirements.txtConfigure Apache and WSGI
Now we need to update mydjangoproject/mydjangoproject/wsgi.py to work under the virtualenv. Basically, what we did above, but search for test_django and replace with mydjangoproject:
# coding=utf-8"""WSGI config for mydjangoproject project.It exposes the WSGI callable as a module-level variable named ``application``.For more information on this file, seehttps://docs.djangoproject.com/en/1.6/howto/deployment/wsgi/"""import os, sys, site# Add the virtualenv site-packages, to override any system-wide packagessite.addsitedir('/home/myuser/.virtualenvs/myvenv/lib/python2.7/site-packages')os.environ.setdefault("DJANGO_SETTINGS_MODULE", "mydjangoproject.settings")# Activate the virtualenvactivate_this = os.path.expanduser("~/.virtualenvs/myvenv/bin/activate_this.py")execfile(activate_this, dict(__file__=activate_this))# Calculate the path based on the location of the WSGI scriptproject = '/home/myuser/webapps/new_django/mydjangoproject/'workspace = os.path.dirname(project)sys.path.append(workspace)sys.path = ['/home/myuser/webapps/new_django/mydjangoproject', '/home/myuser/webapps/new_django/mydjangoproject/mydjangoproject', '/home/myuser/webapps/new_django'] + sys.pathfrom django.core.wsgi import get_wsgi_applicationapplication = get_wsgi_application()And then we’re ready to tell Apache to use the wsgi.py in our real Django project, instead of the test one. Edit apache2/conf/httpd.conf again. Like in wsgi.py, you can search for test_django and replace all occurrences with mydjangoproject:
ServerRoot "/home/myuser/webapps/new_django/apache2"LoadModule authz_core_module modules/mod_authz_core.soLoadModule dir_module modules/mod_dir.soLoadModule env_module modules/mod_env.soLoadModule log_config_module modules/mod_log_config.soLoadModule mime_module modules/mod_mime.soLoadModule rewrite_module modules/mod_rewrite.soLoadModule setenvif_module modules/mod_setenvif.soLoadModule wsgi_module modules/mod_wsgi.soLoadModule unixd_module modules/mod_unixd.soLoadModule alias_module modules/mod_alias.soLogFormat "%{X-Forwarded-For}i %l %u %t \"%r\" %>s %b \"%{Referer}i\" \"%{User-Agent}i\"" combinedCustomLog /home/myuser/logs/user/access_new_django.log combinedErrorLog /home/myuser/logs/user/error_new_django.logListen 22884KeepAlive OffSetEnvIf X-Forwarded-SSL on HTTPS=1ServerLimit 1StartServers 1MaxRequestWorkers 5MinSpareThreads 1MaxSpareThreads 3ThreadsPerChild 5WSGIPythonPath /home/myuser/webapps/new_django:/home/myuser/webapps/new_django/mydjangoproject:/home/myuser/webapps/new_django/lib/python2.7WSGIDaemonProcess new_django processes=2 threads=12 python-path=/home/myuser/webapps/new_django:/home/myuser/webapps/new_django/mydjangoproject:/home/myuser/webapps/new_django/lib/python2.7WSGIProcessGroup new_djangoWSGIRestrictEmbedded OnWSGILazyInitialization OnWSGIScriptAlias / /home/myuser/webapps/new_django/mydjangoproject/mydjangoproject/wsgi.pyNow, restart the server again:
(myvenv)$ ./apache2/bin/restart
…and you should be in business! Visit http://mysite.com/new_django/, and you should see the front page of your real Django site.
Move the webapp to the root URL
Now, we can’t test the rest of the site too well with it being on the /new_django/ subdirectory, so at least for my test server, this is the point at which I am going to go ahead and put it on the / root of the URL.
Warning
For the production server, maybe best to wait until last for moving this, but for the test server, this lets me test everything now.
Log in to my.webfaction.com, and go to:
- Domains / Websites > Websites > mysite:
- In Contents, click the ✕ on the right side of the blue bar for
old_djangoand click Save. This will remove the old webapp from the site. - Reopen Contents and click on the left side of the bar for
new_djangoand change the directory to/. Save again.
Note
We have to do it in this staged way, because if we change a new webapp to the root url before changing or deleting the old one, WebFaction will complain that a webapp is already assigned.
fuckyeahbacktowherewestarted.tumblr.com
So now virtualenv is installed and active, the Django project is working, and we can do the real Django upgrade for really reals.
Add django-downtime
This is optional, but I’m going to install the django-downtime app, so I can display a public message while we’re upgrading.
(myvenv)$ cd ~/webapps/new_django/mydjangoproject(myvenv)$ pip install django-downtimeInside ~/webapps/new_django/mydjangoproject/mydjangoproject/settings.py:
- Add
'downtime',toINSTALLED_APPS - Add
'downtime.middleware.DowntimeMiddleware', # must be firstto the top ofMIDDLEWARE_CLASSES - Add an exempt path, so we can control downtime (or other things) from the Django site admin, if we need to:
DOWNTIME_EXEMPT_PATHS = ( '/admin',)Add mydjangoproject/templates/downtime/downtime.html for the page that will display when downtime is activated.
Warning
You’ll want to make this HTML page completely self-contained, so nothing that you may be upgrading in the rest of the site will affect it.
Migrate the database to add the downtime tables. Since we’re still on South for migrations:
(myvenv)$ python ./manage.py schemamigration downtime --initial(myvenv)$ python ./manage.py migrate downtimeRun final migrations
Before upgrading away from South, we need to make sure that all of our Django apps are migrated, and the database represents the most recent updates to the model. Check out this bit in the Django documentation for more about preparing to upgrade from South.
(myvenv)$ python manage.py schemamigration app1 --auto(myvenv)$ python manage.py migrate app1(myvenv)$ python manage.py schemamigration app2 --auto(myvenv)$ python manage.py migrate app2...Restart apache one last time to make sure everything’s good:
(myvenv)$ ../apache2/bin/restartUpgrade to Django 1.8
Start Downtime
(myvenv)$ manage.py downtime_startUpgrade dependencies & Django 1.8.3
Upload a new requirements.txt from your development machine (you did test the Django upgrade on another machine first, right?). This should now include Django==1.8.3 and upgraded versions of any other dependencies. If you want to upgrade to the most recent version, delete the ==n.n.n version number next to a package name, and pip will grab the latest.
Then upgrade ALL OF THE THINGS:
(myvenv)$ pip install --upgrade -r requirements.txtUpgrade from South
- Remove
'south',fromINSTALLED_APPSinsettings.py. - Delete all of the numbered migration files (in each Django
app/migrations/directory), but don’t delete themigrationsdirectory itself or__init__.pyinside it - Make sure you remove the
.pycfiles too. - Don’t forget to delete the South migrations for downtime in
/home/myuser/.virtualenvs/myvenv/lib/python2.7/site-packages/downtime/migrations - I also deleted ALL of the .pyc files across the site, just in case. Probably not necessary, but it made me feel warm and fuzzy.
- If you have custom models, update them for Django’s built-in migrations. For instance, I had to remove South’s
add_introspection_rulesand add a newdeconstruct()method. (myvenv)$ pip uninstall South(myvenv)$ python manage.py makemigrations. This runs the built-in migrations for the first time. Django should see the empty migration directories and make new initial migrations in the new format.(myvenv)$ python manage.py migrate --fake-initial. Django will see that the tables for the initial migrations already exist and mark them as applied without running them. (Django won’t check that the table schema match your models, just that the right table names exist).
Restart Apache
(myvenv)$ ../apache2/bin/restart
Did it work? Yay! Then let’s…
End downtime
(myvenv)$ python manage.py downtime_end
…and all should be right with the world. The Django site is now on Django 1.8.3 and running inside a virtualenv that’s upgradeable in the future!
If you didn’t move the new_django webapp to the root URL before, now’s the time to do that.
Boom
Special thanks to these developers, authors, and forum thread posters for writing about their experiences and contributing to my upgrading success!
- Setting up Django in Virtualenv on WebFaction’s Apache with mod_wsgi by Michał Karzyński
- Webfaction + Virtualenv – How To by Theneum
- Simple virtualenv usage with Django? thread answer by ryans
- Using VirtualEnvs with Django thread answer by Prajwal
- Best practices with Django on WebFaction by Luke Plant
- Why does pip show all packages in virtualenv? thread answer by timg
- And big thanks to boyonwheels for encouraging me to try Django in the first place!