The Apple Pro Keyboard is mushy and unresponsive, but worst of all, it traps and showcases dirt inside its clear plastic shell as if it were a disgusting work of art.
If you want to get back to your pristine-looking APK, it takes a fair amount of effort to take apart and clean. This guide should save you a bit of the stumbling around it takes to discover how to disassemble the thing, and let you get to the nitty-gritty, as it were.
You will need:
- Surface cleaning solution (Formula 409, Windex Surface, or similar)
- Paper towels, Q-tips and an old toothbrush
- Small plastic bin with a watertight lid
- Keycap-puller tool, or a plastic or nylon stick of some sort
- #1 and #2 Philips screwdrivers
- T5 Torx driver
- Someplace to put the screws that you’ll remove, keeping them in order. Maybe a nice little segmented container.
- Silicone grease
First, the APK in question:
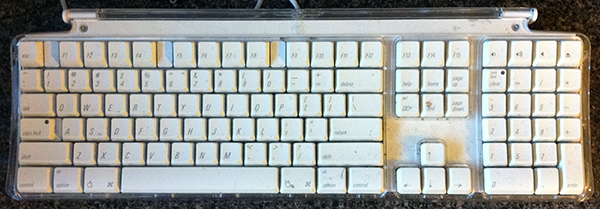
Doesn’t look too terrible at this resolution, but trust me -- up close, it looks positively horrid.
First, we’ll pop off the keys, and OH MY GOD WHAT THE HELL IS THAT.
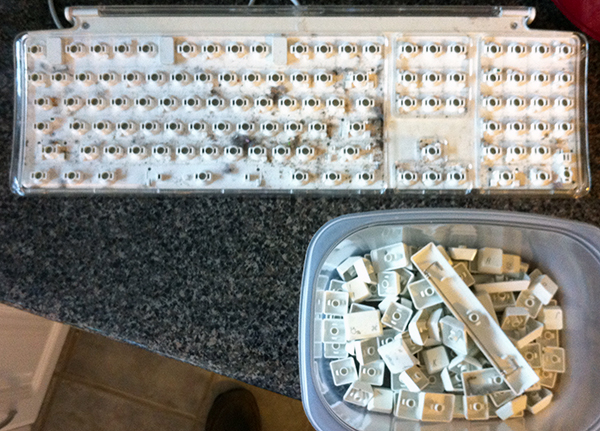
Popping off the keys is very straightforward if you have a keycap-puller tool, but really any thin, flat blade can be used to pop ‘em off in a pinch. Just be careful about scratching up the case if you’re using a metal screwdriver or something like that. Once you have the keycaps off, you can also use the blade to pry off the three plastic rectangles that separate the function keys on the top row. Once you get under the edge, they pop off just like the keycaps do.
Toss them in the plastic bin, spritz ‘em with the surface cleaner, and let them soak for a few minutes. Maybe several. We’ll move on to separating the upper frame while those get all nice and soak-y.
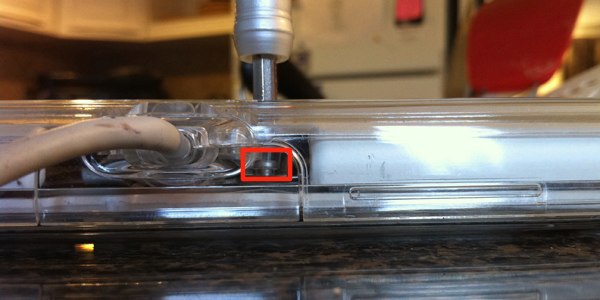
To remove the upper frame, first flip the keyboard upside down and remove the four Torx/hex screws on the back, being careful to keep them in order (they’re two different lengths):
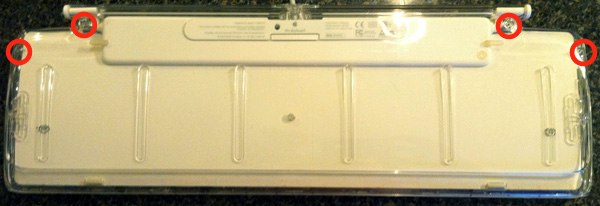
To be perfectly honest, they look like tiny hex, but the T5 Torx was the bit I had that worked. Let me know if you discover a better fit.
Turn the keyboard back over, and lift up on the top edge of the clear plastic frame, and gently wiggle the plastic clips free across the bottom edge of the keyboard.
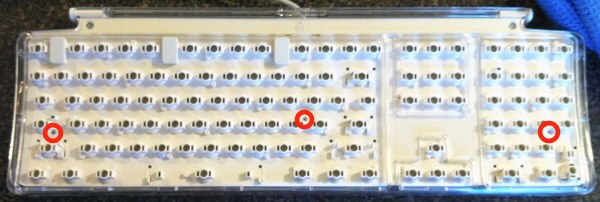
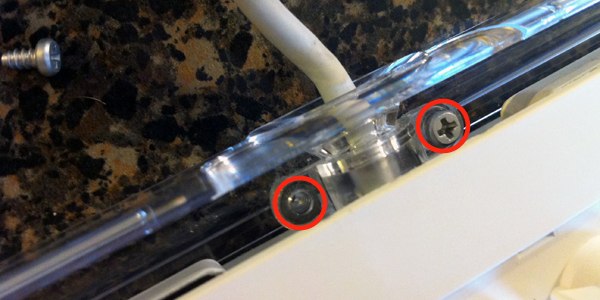
Now, we can work on releasing the white middle bits from the acrylic sandwich. Remove the three tiny Philips screws from the middle of the keyboard (again they’re two different lengths, keep ‘em sorted):
Now to the two Philips screws that hold on the clear acrylic clamp around the USB cable:
Great! Now we’re ready to gently lift on the… Crap! There’s still another screw, isn’t there?
Turns out you need to need to punch a hole in the label on the back of your keyboard, here:
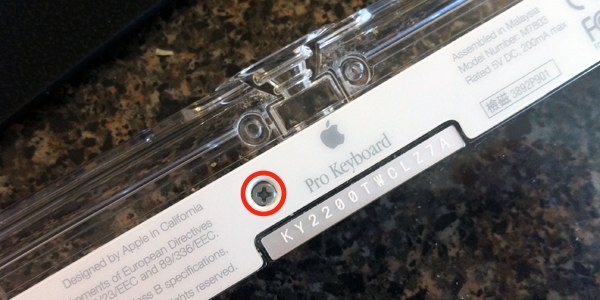
...to get at this screw:
This probably voids your warranty, but seeing as how any Apple Pro Keyboard is at least seven years old at this point, your warranty’s long over anyway. Still, if you void your warranty, break your keyboard, spill something horrible and sticky in it, and your computer explodes, it’s your own damn fault. Don’t come crying to me.
Now, we can finally lift up gently on the white bits in the middle (the USB “hub” ports may take a little individual nudging) and separate everything so we can really get at it.

The clear acrylic bits can withstand the surface cleaner straight up, but the white surface where the keycaps pop on needs an indirect touch. Spray a bit of cleaner on the toothbrush, and use that to scrub between all the nooks and crannies. You don’t want to spray it directly on, as then it may leak into the rubber membrane area where the keys press down, and you might gunk it up or short something out if it hasn’t dried before you plug things back in.
Use the Q-tips to get in the tight spots, and in the super-tight front edge of the upper frame where the clips are, I found a paper towel wrapped around the edge of a credit card lets you get in there and scrub.
Now, for the keycaps, add some hot tap water to the bin (just enough to cover the keys), put the lid on, and shake, shake, shake, Senora. That lid was water-tight, right?
Use towels (paper or otherwise) to wipe off the keycaps. The long soak and the agitation should have dislodged or loosened most of the oils and dirt that plague keyboards, but if there’s a particularly stubborn spot, feel free to take the toothbrush to the keycaps.
Re-assembly is the reverse of disassembly. Make sure everything’s dry before you start putting it back together. Put a little dab of silicone grease on the little metal wires where they touch the keycaps, and where they slot into the tabs on the white keyboard base.
Never looked better!
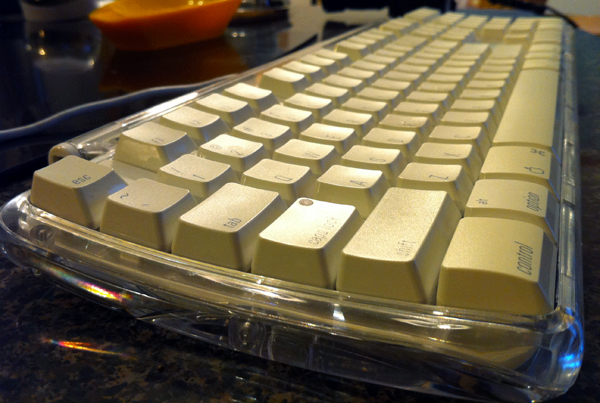
Well, okay… maybe the once, a decade ago, but this is pretty close.
I was hoping that link was to the best visual presentation of that song… http://www.youtube.com/watch?v=tpFKPM8vkQM